

Beginner's guide to setting up and streaming with XSplit

Whether you're streaming from a PC or console, to go the accented all-time quality broadcast you lot're probably looking for some great software. In the case of Windows, one of the near pop choices is XSplit.
It isn't free, unlike the other popular choice, OBS, just for a fairly reasonable subscription, you lot get a really convenient app that's very straightforward to get to grips with.
Here, I'll evidence yous how the nuts and how to get your stream up and running using XSplit Broadcaster.
See at XSplit
How to connect Twitch or Mixer to XSplit

Before you stream anything anywhere y'all need to requite XSplit the credentials to circulate on your channel. Exactly how you do this on the broad range of services OBS supports will vary, but I'm covering Twitch and Mixer for the purposes of this guide.
In the other popular app, OBS, y'all have to generate a stream key which then pastes into the app. In XSplit it's much simpler and the process doesn't crave annihilation outside of the app.
- Click on outputs in the bill of fare bar.
- Select prepare a new output.
- Choose your service.
Whether you've chosen Twitch or Mixer you'll now be asked to log in to your account to authenticate XSplit to stream to your aqueduct.
How to prepare upwardly output resolution and bitrate in XSplit

Now you lot're gear up to really stream, the first stride is to set your resolution, frame charge per unit, and bitrate. The higher each of these the more bandwidth and horsepower yous'll need from your PC. XSplit has a built-in bandwidth checker, so I recommend running this before settling on your settings to brand certain your connexion can handle it.
If you've got a really fast internet connectedness and a powerful PC, and so you tin can probably stream at 1080p60 at a loftier bitrate. Only, you as well need to remainder this with providing a stream that'due south non going to buffer like mad for your viewers who might be on slower connections.
- Click on outputs in the menu bar.
- Click on the settings cog side by side to the streaming service you lot set above.
- Change the bitrate value to whatever you want it to be.
- Click OK.
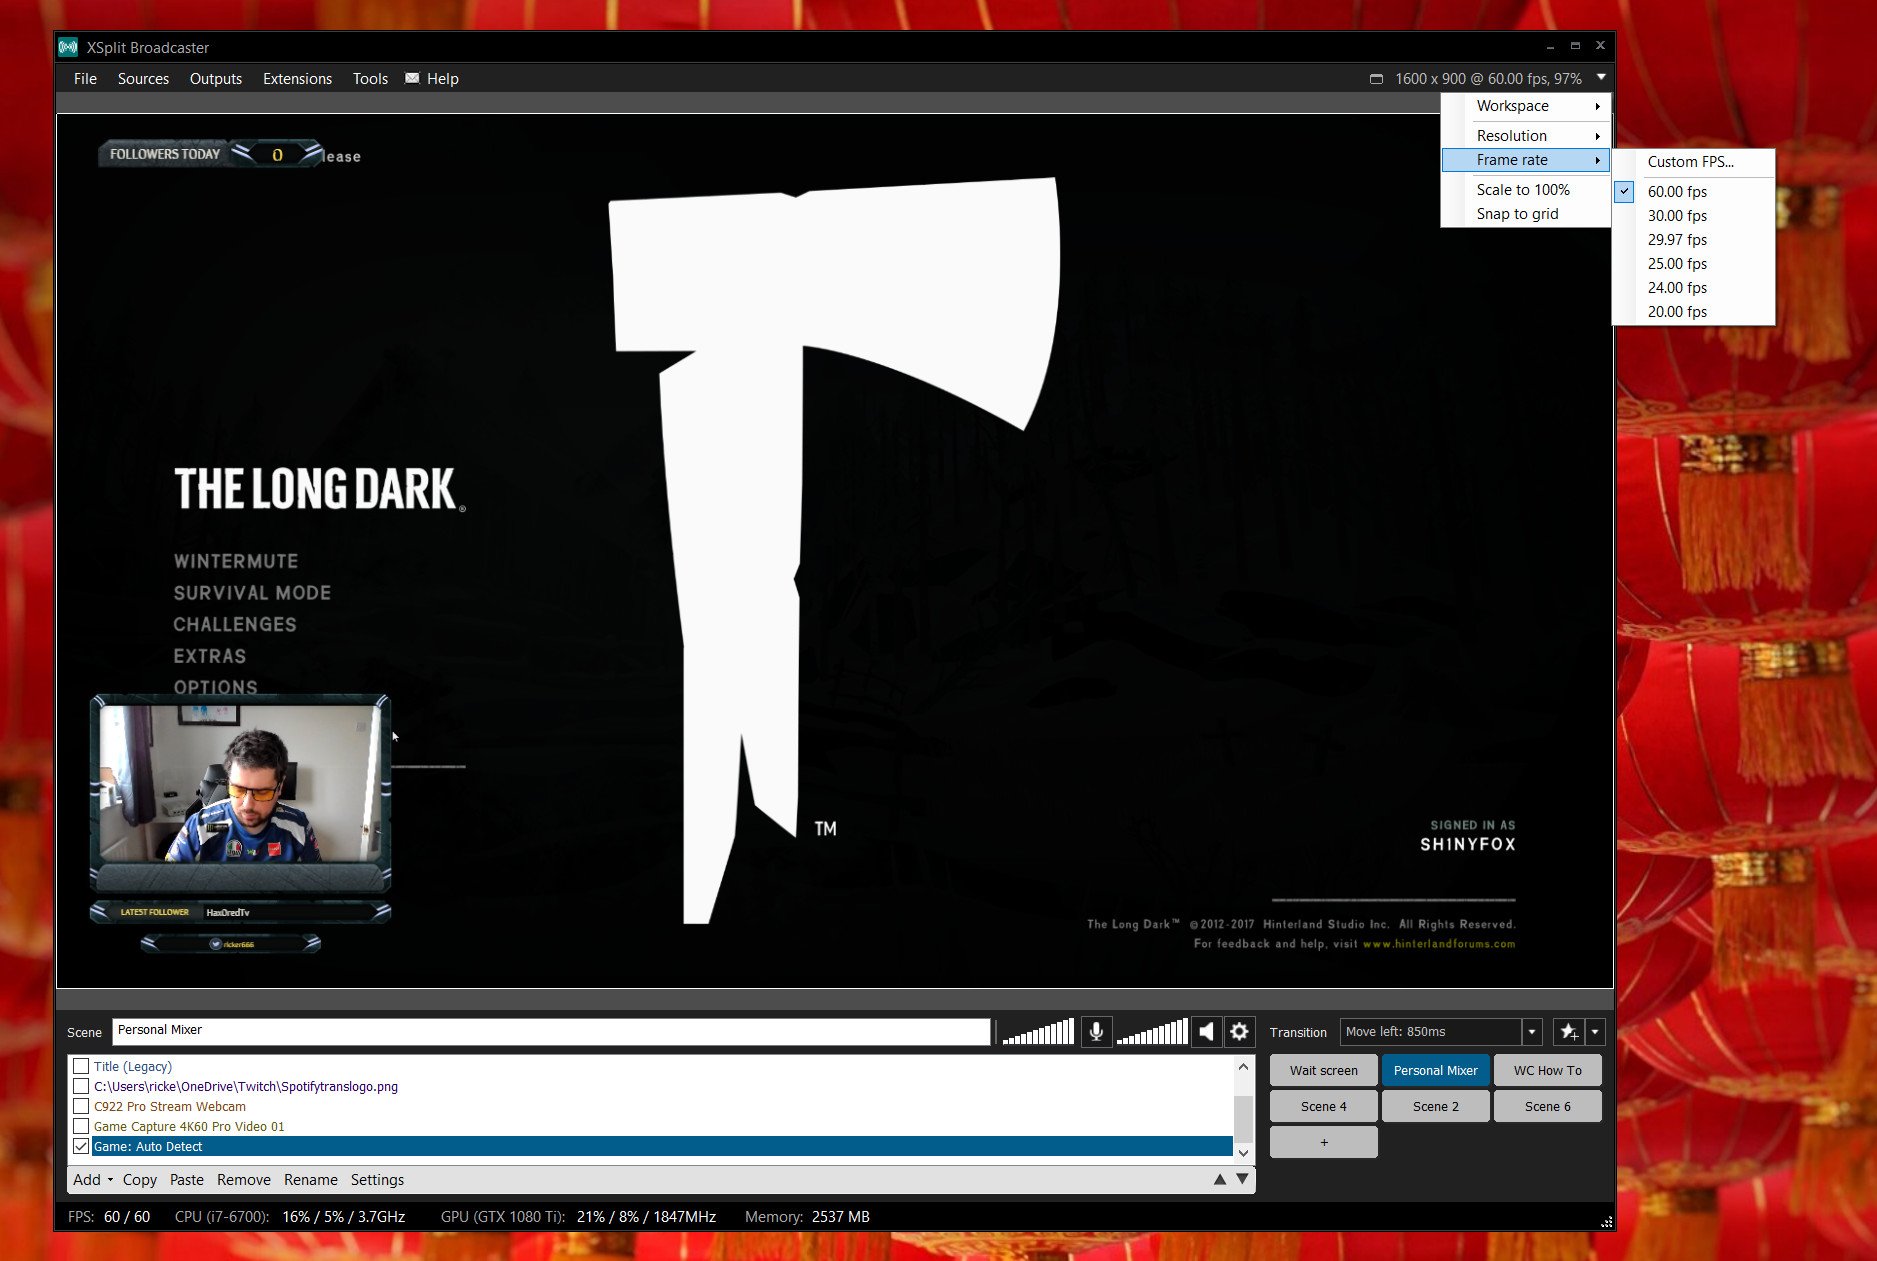
- Next, click on the drop-downwardly box in the top right corner of the primary window.
- Select resolution.
-
Change the resolution to match your desired output, regardless of the resolution you play your games at.

- Follow step 5 again, this time selecting frame rate.
-
Modify the frame rate to whatever you want information technology to exist.


Twitch has a handy resource on the sort of bitrates you should be using depending on your output, and then information technology's worth reading upward and balancing these figures against the upload speed from your cyberspace provider. Mixer has a like resource for streaming there.
How to set up audio devices in XSplit

With your video output now set upwards, it'due south time to plow to audio. Without nifty audio, your stream will exist a disaster, so information technology's important to get things correct.
If you accept multiple audio devices that you want to connect, I recommend using Voicemeeter Assistant to manage things, considering it's extremely powerful and once y'all've got over the initial learning curve, actually easy to utilize.
How to apply Voicemeeter Assistant to manage your PC audio
Whatever you're using, here'south how to fix your audio upward in XSplit.
- Click on tools in the menu bar.
- Click settings.
- Select the audio tab.
Here yous'll set your default audio inputs and outputs, whether you're wanting to preview the output sound anywhere and where your organization sound is coming from. If you're using a program like Voicemeeter you lot'll turn everything off and set your microphone to the Voicemeeter output. If y'all're only plugging your devices into your PC and letting XSplit handle them, this is where you assign them.
There are sliders in the main window to alter your system volume and microphone book, too, without having to go into settings.
How to add capture cards and webcams to XSplit

If you lot're streaming console games and so you'll need to add your capture card as a source in XSplit. Whether yous're streaming panel or PC, yous'll probably also want to add a webcam so your viewers can encounter your beautiful face while you play.
The good news is that both devices are added to XSplit in the same way. Hither'southward how.

- In the sources box, click add.
- Select devices.
- Then select video.
- Click on your capture card or webcam.
Now a window will be added for your video capture device that you can motion around and resize as you lot come across fit.
How to add PC game capture to XSplit

If you're going to be streaming PC games, so XSplit can automatically detect these and import them for employ. Information technology works also for DX12 games from the Microsoft Store.
Gear up information technology up similarly to other sources.
- In the sources box, click add.
- Select game capture.
- Click auto detect.
You'll now have a single source added that will notice any game you're playing automatically and capture it into XSplit. Alternatively, when you're playing a game you tin follow the same steps and just add that i game individually.
XSplit will recognize Microsoft Shop apps and games the same and has a addiction of pulling these in when you lot're actually wanting something else. So if you play one game on stream a lot, it might exist a amend setup to just add that equally an XSplit source instead.
How to add together a stream overlay to XSplit

1 terminal thing y'all might want to add right from the start is an overlay to your stream. I've previously written about great services like Player.me and StreamJar which help yous create professional looking overlays with minimal effort on your part.
Besides making your stream look more professional, overlays tin add important alerts such as new followers and subscribers, social media links, goals and much more. Whichever service y'all employ to create 1, calculation to XSplit is the aforementioned every time. You lot'll get a unique URL for your overlay, copy this and follow these steps.
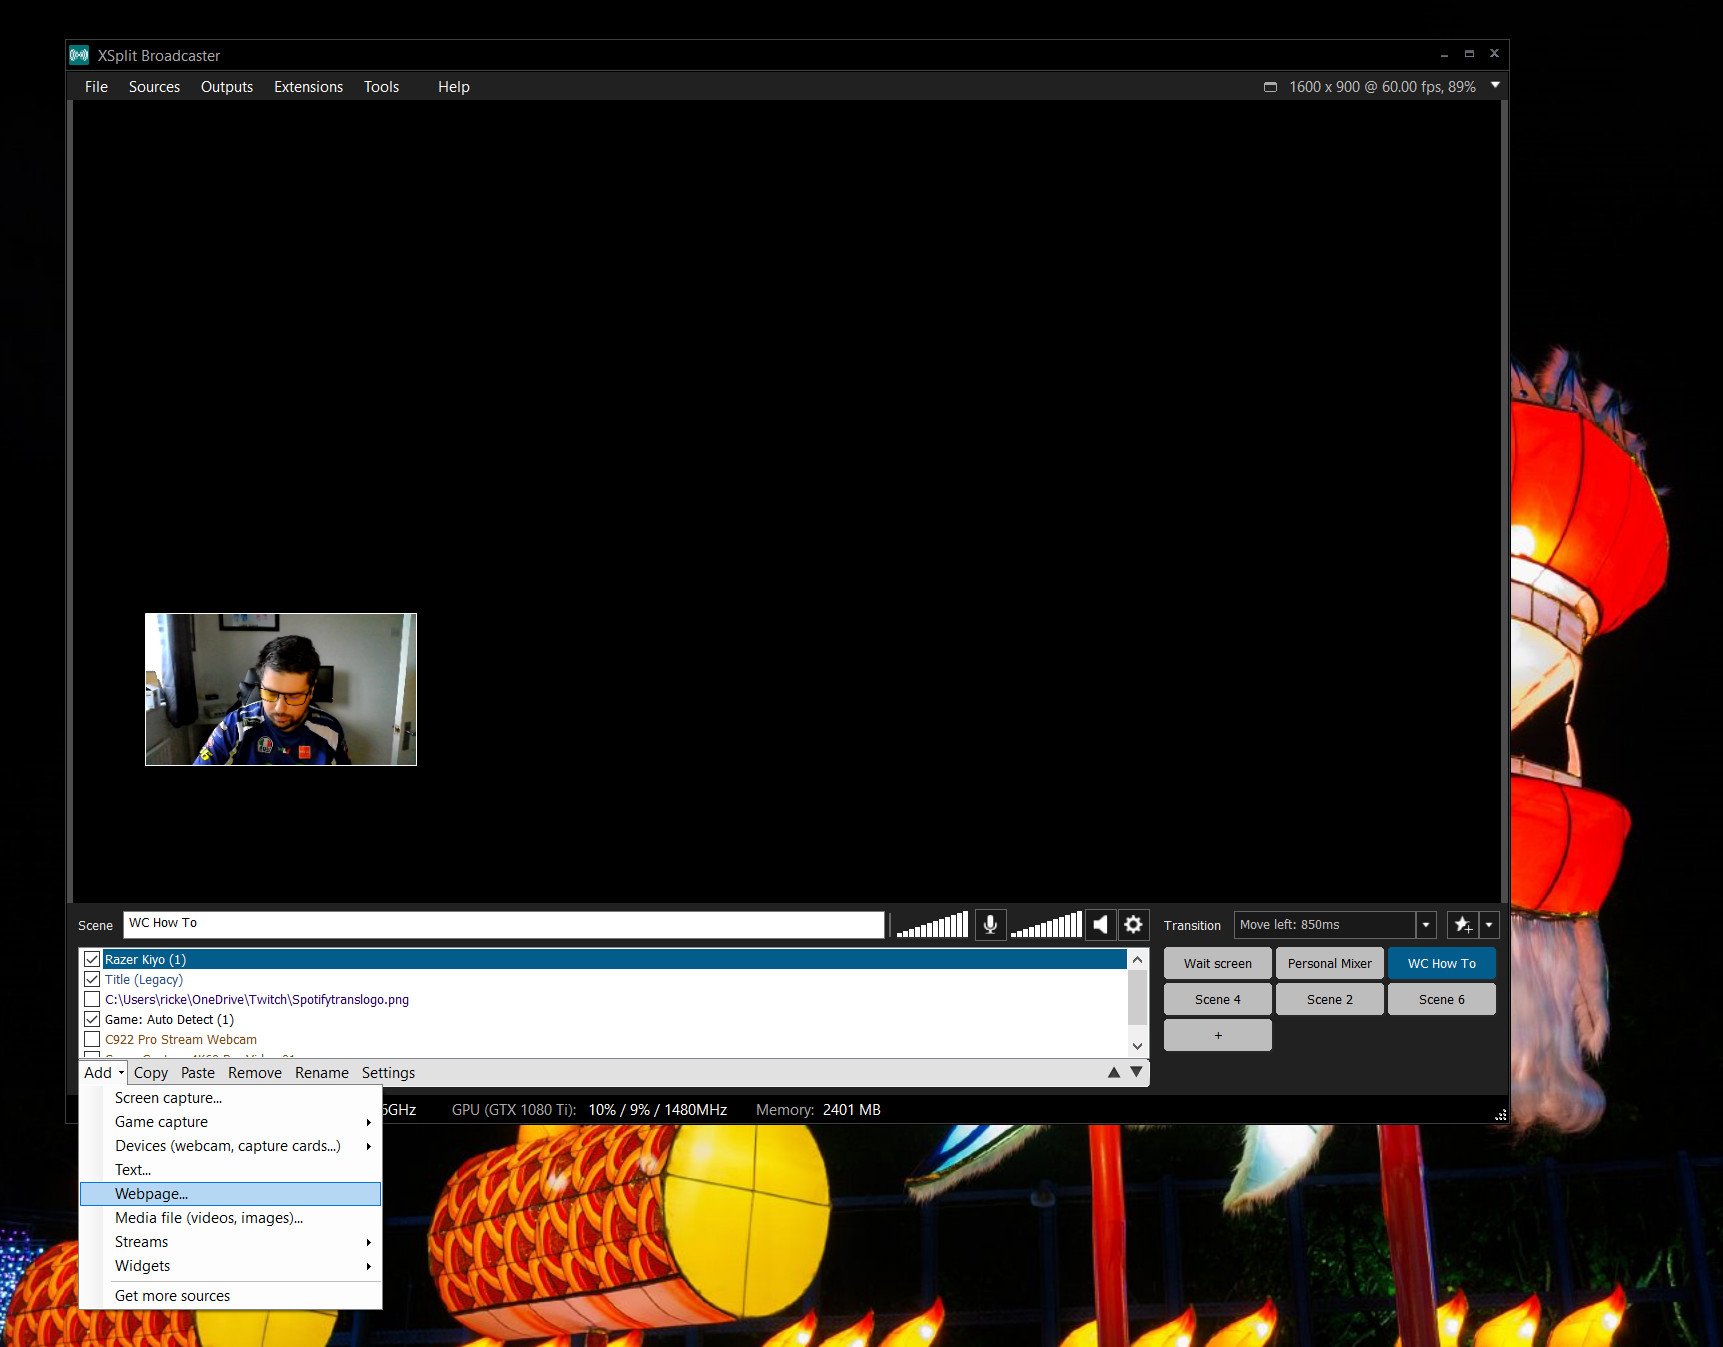
- Click add in the sources box.
-
Select webpage.
-
Paste the URL you copied from your overlay service into the box.
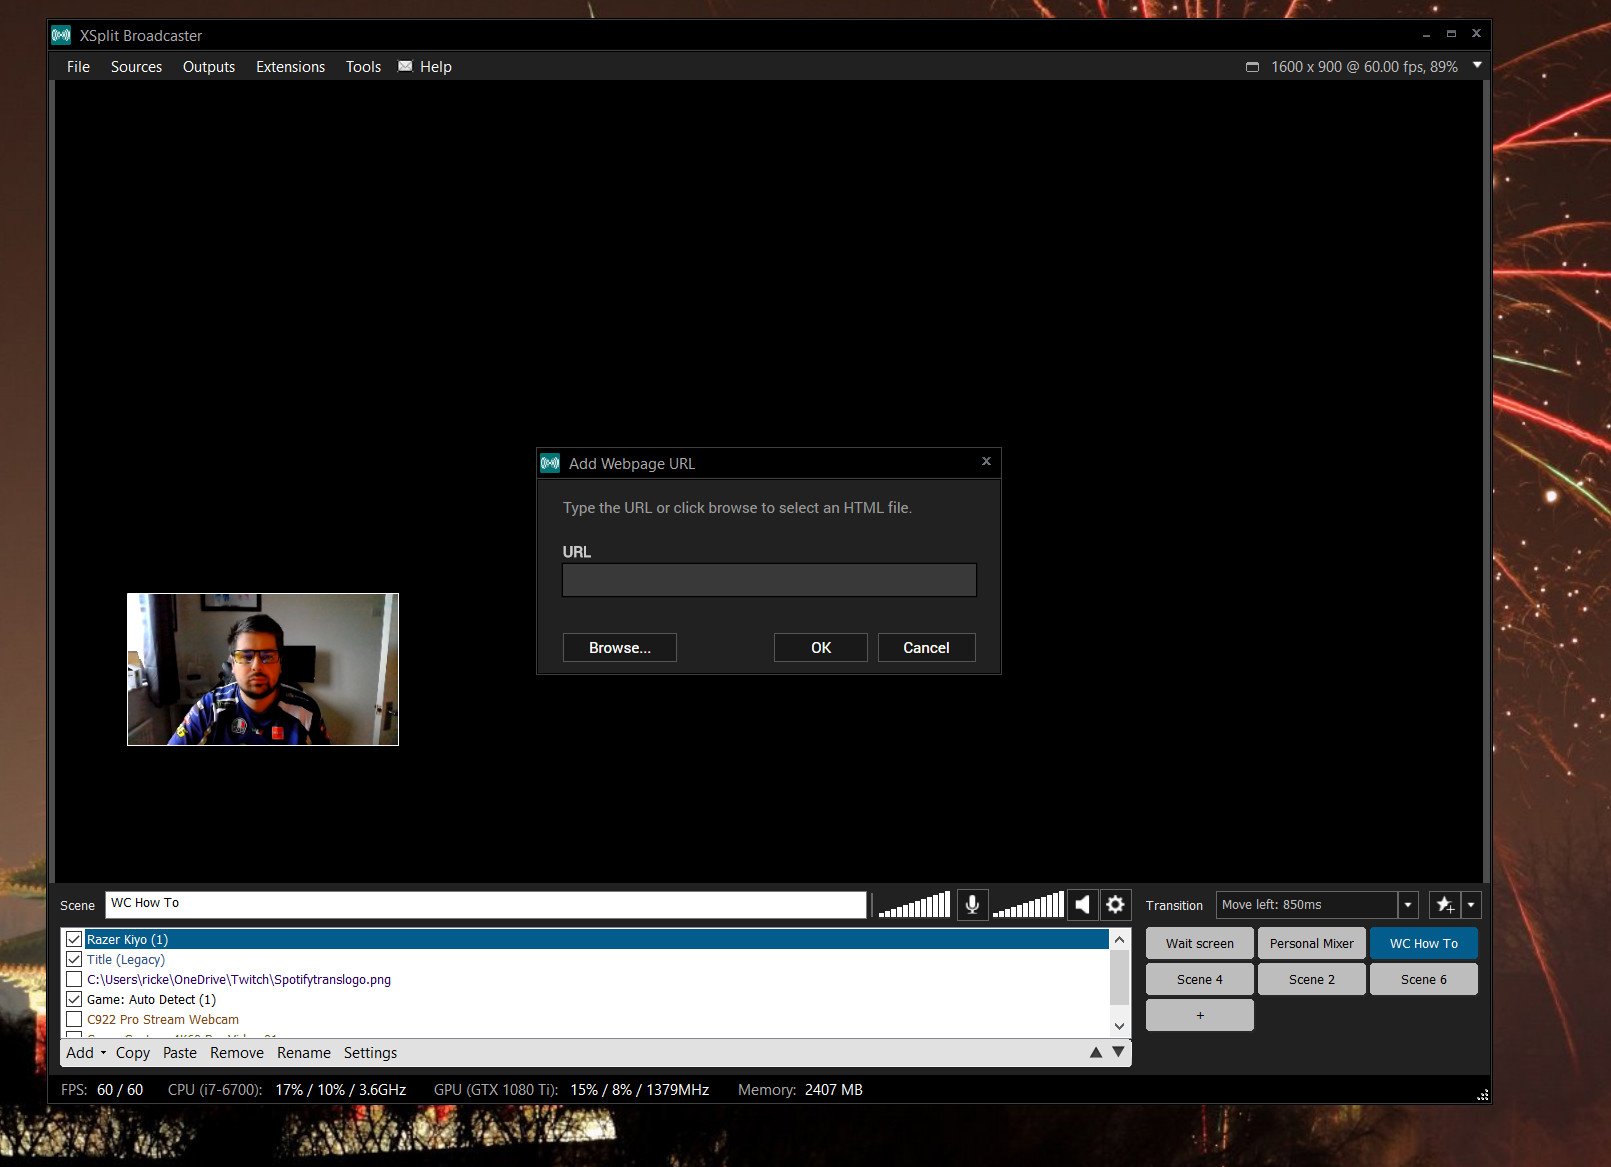


Equally with whatever other source, the overlay will now simply place itself in your XSplit window for you to locate and resize as necessary.
Your tips
That's how to get yourself set with XSplit to stream either console or PC games and have a really corking looking circulate.
If you're an quondam XSplit sorcerer with some tips and tricks to share be certain to driblet them into the comments beneath.
See at XSplit

Source: https://www.windowscentral.com/beginners-guide-xsplit
Posted by: kennedypricandere1942.blogspot.com
0 Response to "Beginner's guide to setting up and streaming with XSplit"
Post a Comment